How to link your form with your email storage solution?
An email storage solution is mostly offered by a company that offers email marketing or bulk email services. It is with this service that opt-in or sign-up lead generation forms can be linked for storing collected email.”
Tip: How to link your form with your email storage solution? - is also available as an ebook (pdf) for offline reading.
If you have been following my series of ebooks on the fundamentals of email marketing, you should be able to understand where you should use sign up forms and how to make them.
Now, we will see how to link these forms with your email storage solution or email autoresponder which is the engine of email marketing management. You’d be surprised at how easy it is!
The Application Programming Interface
The way to make a form work with an email service provider is by using the API or application-programming interface.
The purpose of an API is to give a way for your application to ‘talk’ to another application and you do that by providing API keys.
When applications ‘talk’, one application makes the for access with the use of the API key information, and the other application will check if the API key is authorised to access or not.
The secret sauce - the API key
The key is represented by a long string of numbers and letters which is always associated with a URL. It is also generated by the email service application that you are using and then gives it permission to access.
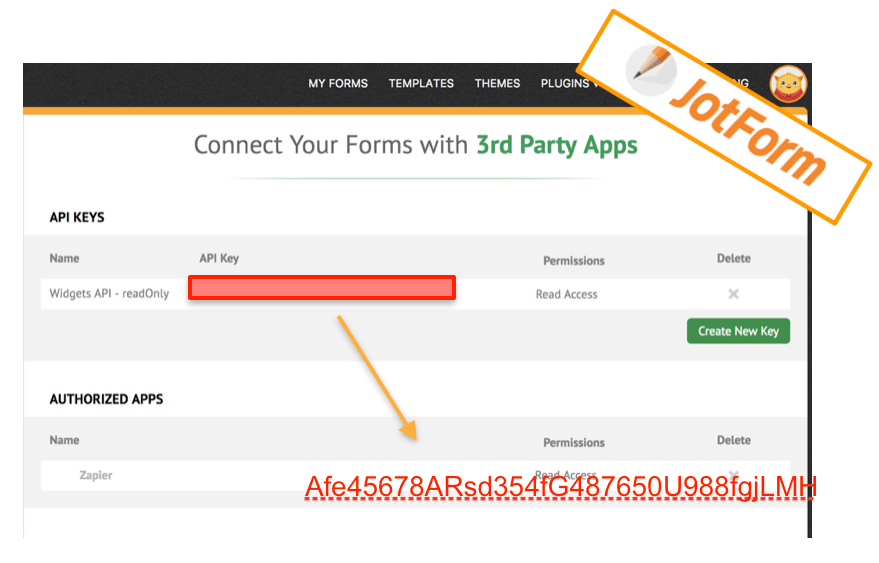
I will show you in a moment where you can locate the API key using JotForm.
Example of setting up a link to a Form
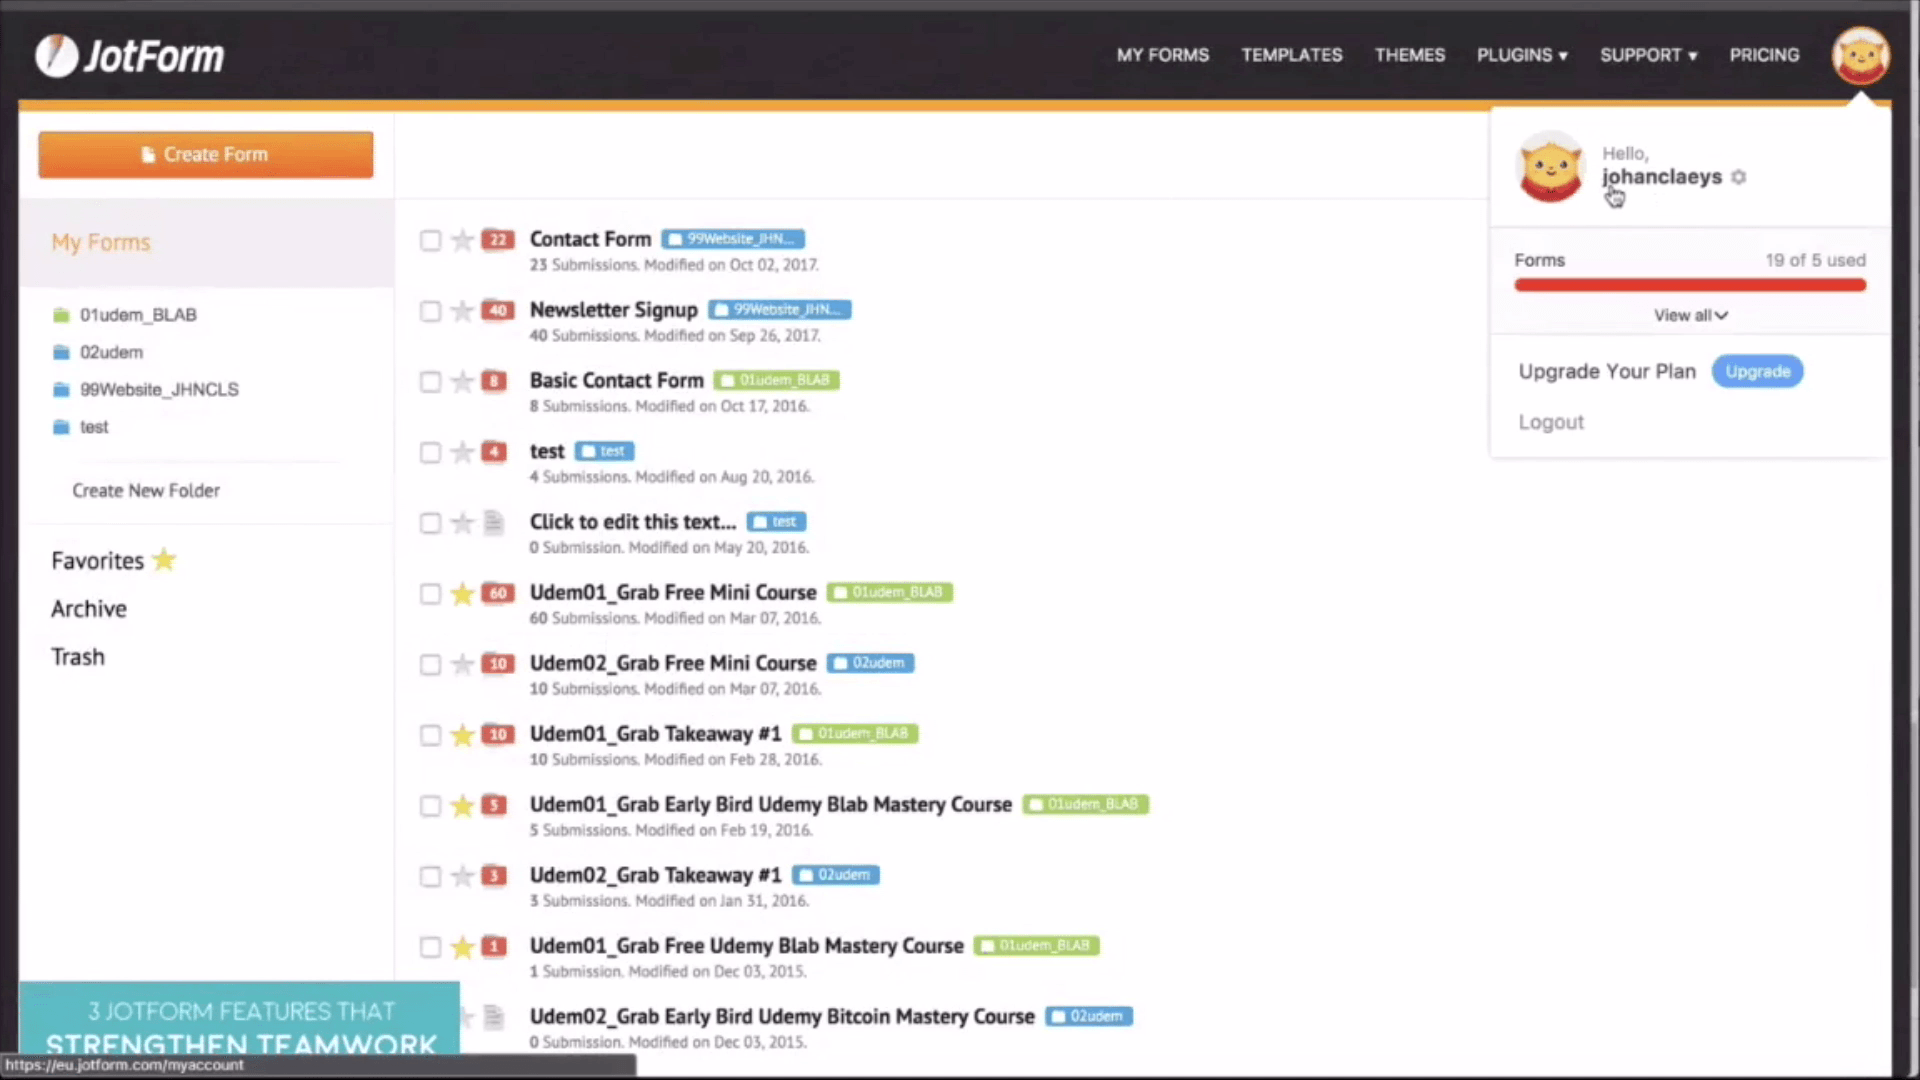
When you are logged into JotForm, you will see on the top right corner that there is a little avatar. When you click on that, you will see your account name and a little cog wheel.
Once you click on the little cog wheel, you will be directed to your account profile by default.
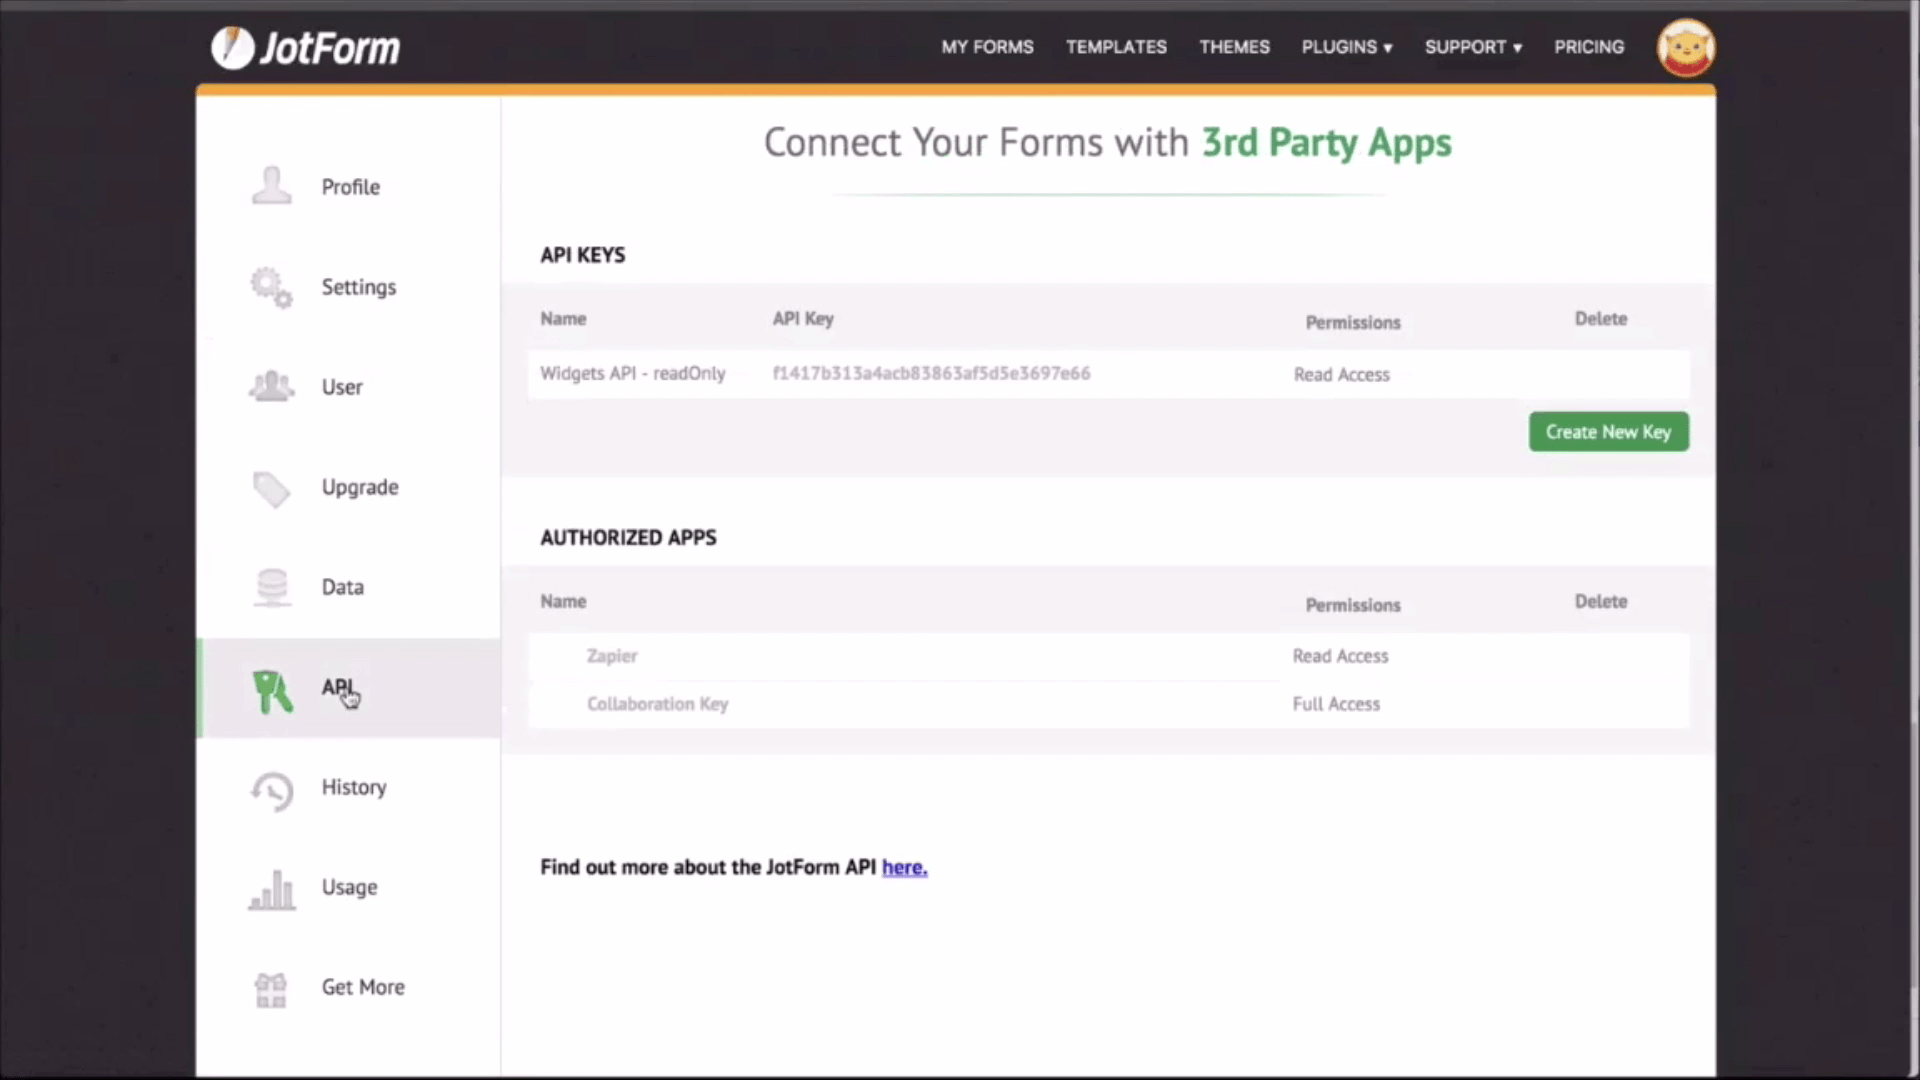
You will also notice that on the navigation panel on the left, you can select ‘API’.
Once you select API, you will see your API key listed there. You can now select and then copy the API key so that you can use it to integrate your service into your Jotform application.
Not easy always to find the API
It’s not always that easy to find the API number in an application. Just remember that notice it is always a long string of numbers and letters.
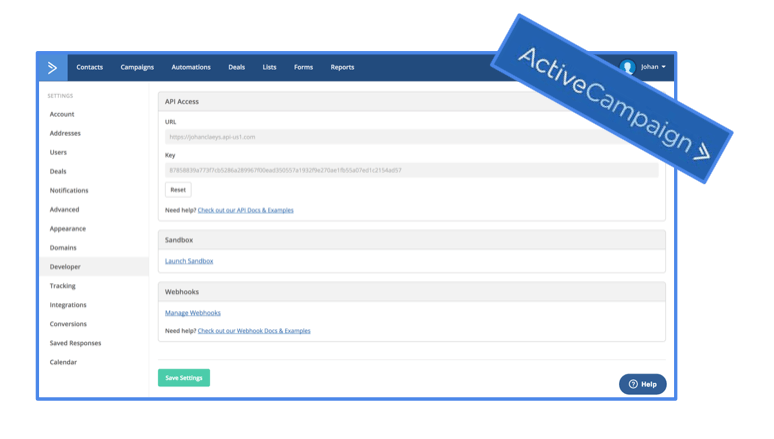
In the app I use, which is ActiveCampaign, The API is found in User/MySettings/Developer/API Access. Which is hardly intuitive!
Choose Email Service to connect to
A Landing Page Builder lets you choose which Email Service Platform to connect to through API. In a page builder like Thrive Architect (from ThriveThemes), which is a WordPress plugin, you can build your form and set up your API connection right within WordPress.
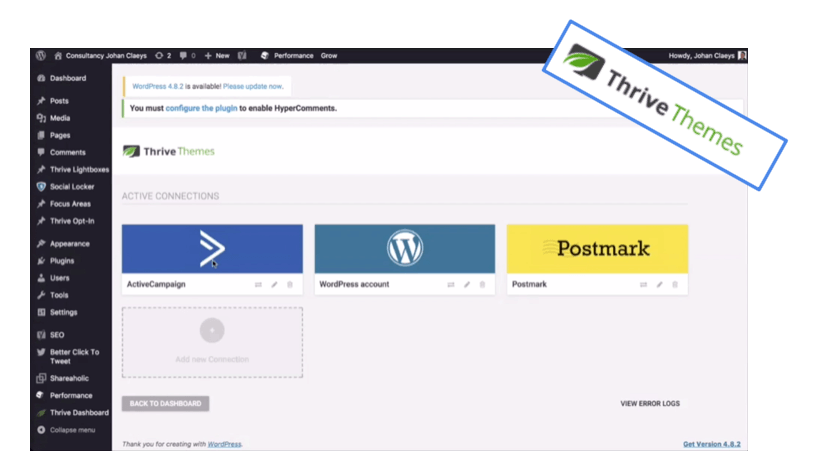
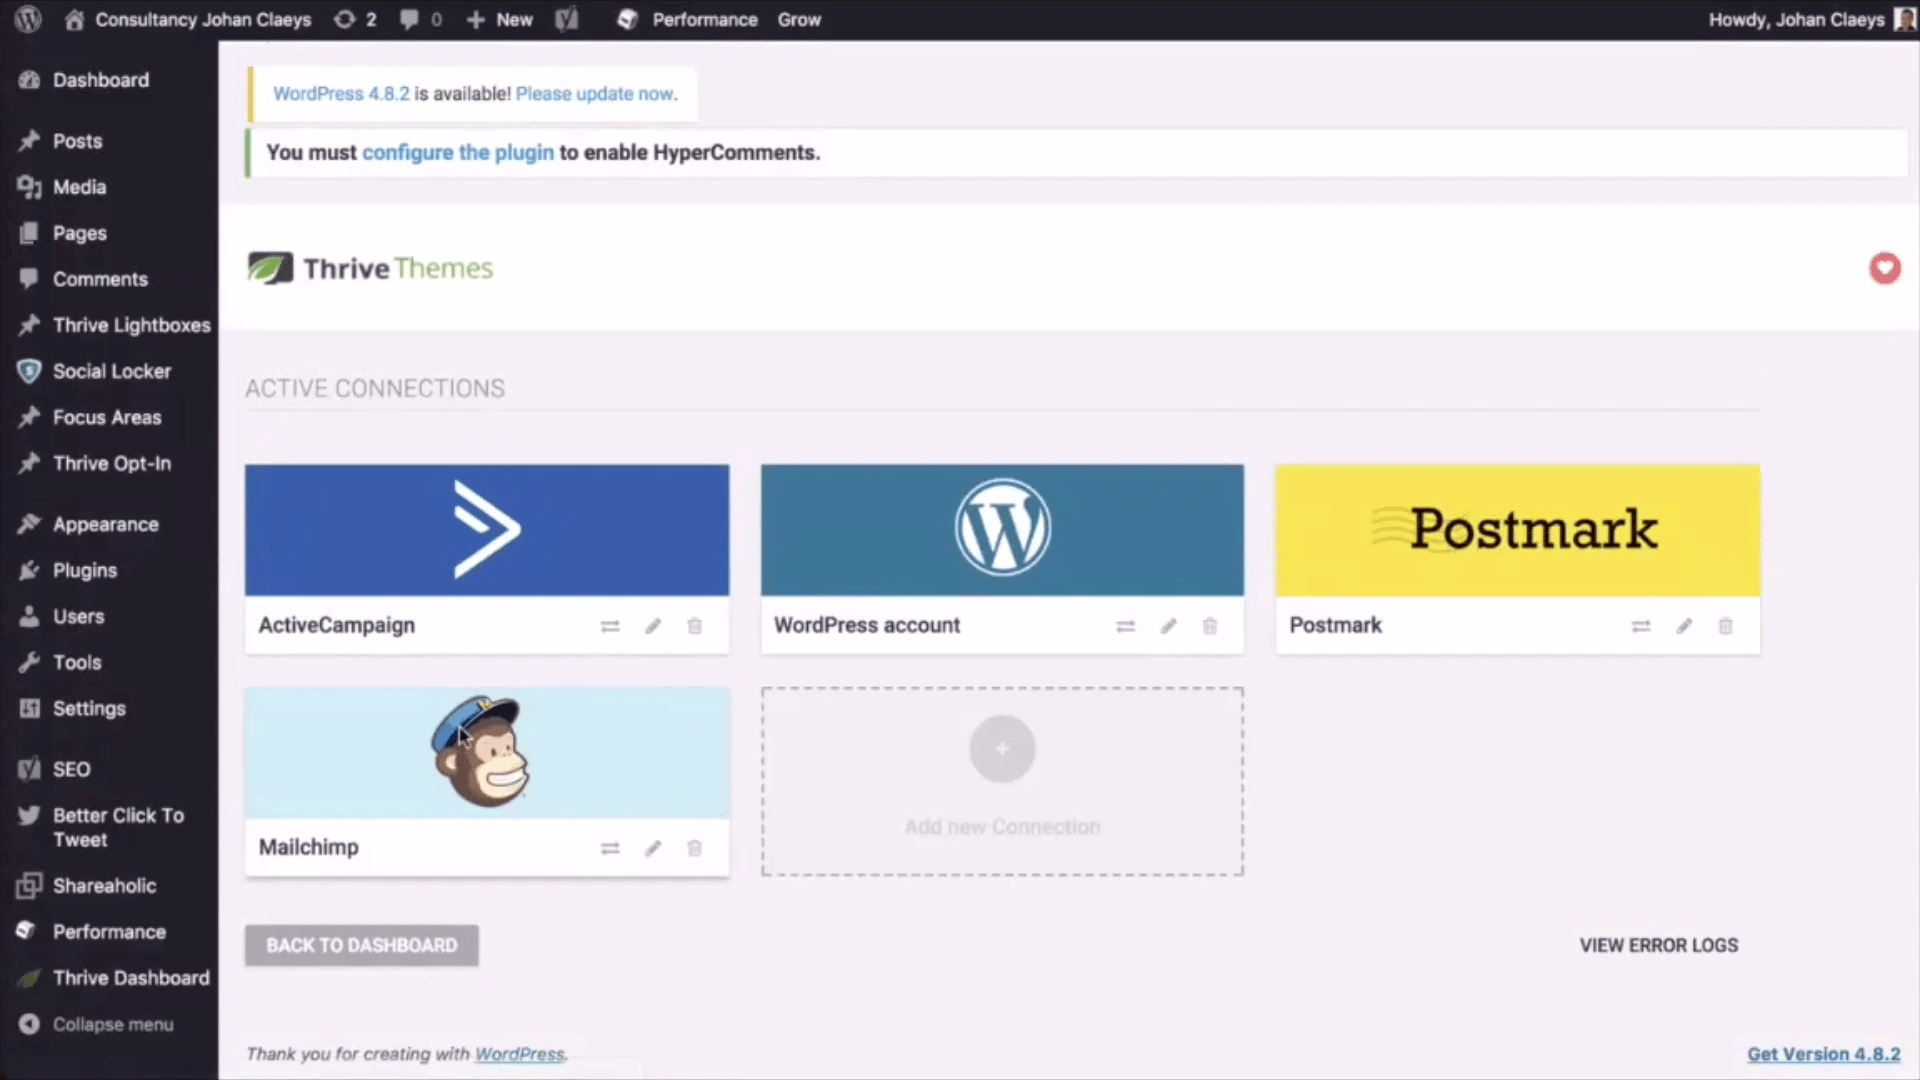
Here you can see that I have already set up API connections for ActiveCampaign, WordPress and Postmark.
You can also see me setting up another connection with MailChimp.
Example of setting up link with landing page builder
Let me show you how you can setup a link between a landing page in ThriveThemes and your email storage solution with MailChimp by using an API connection:
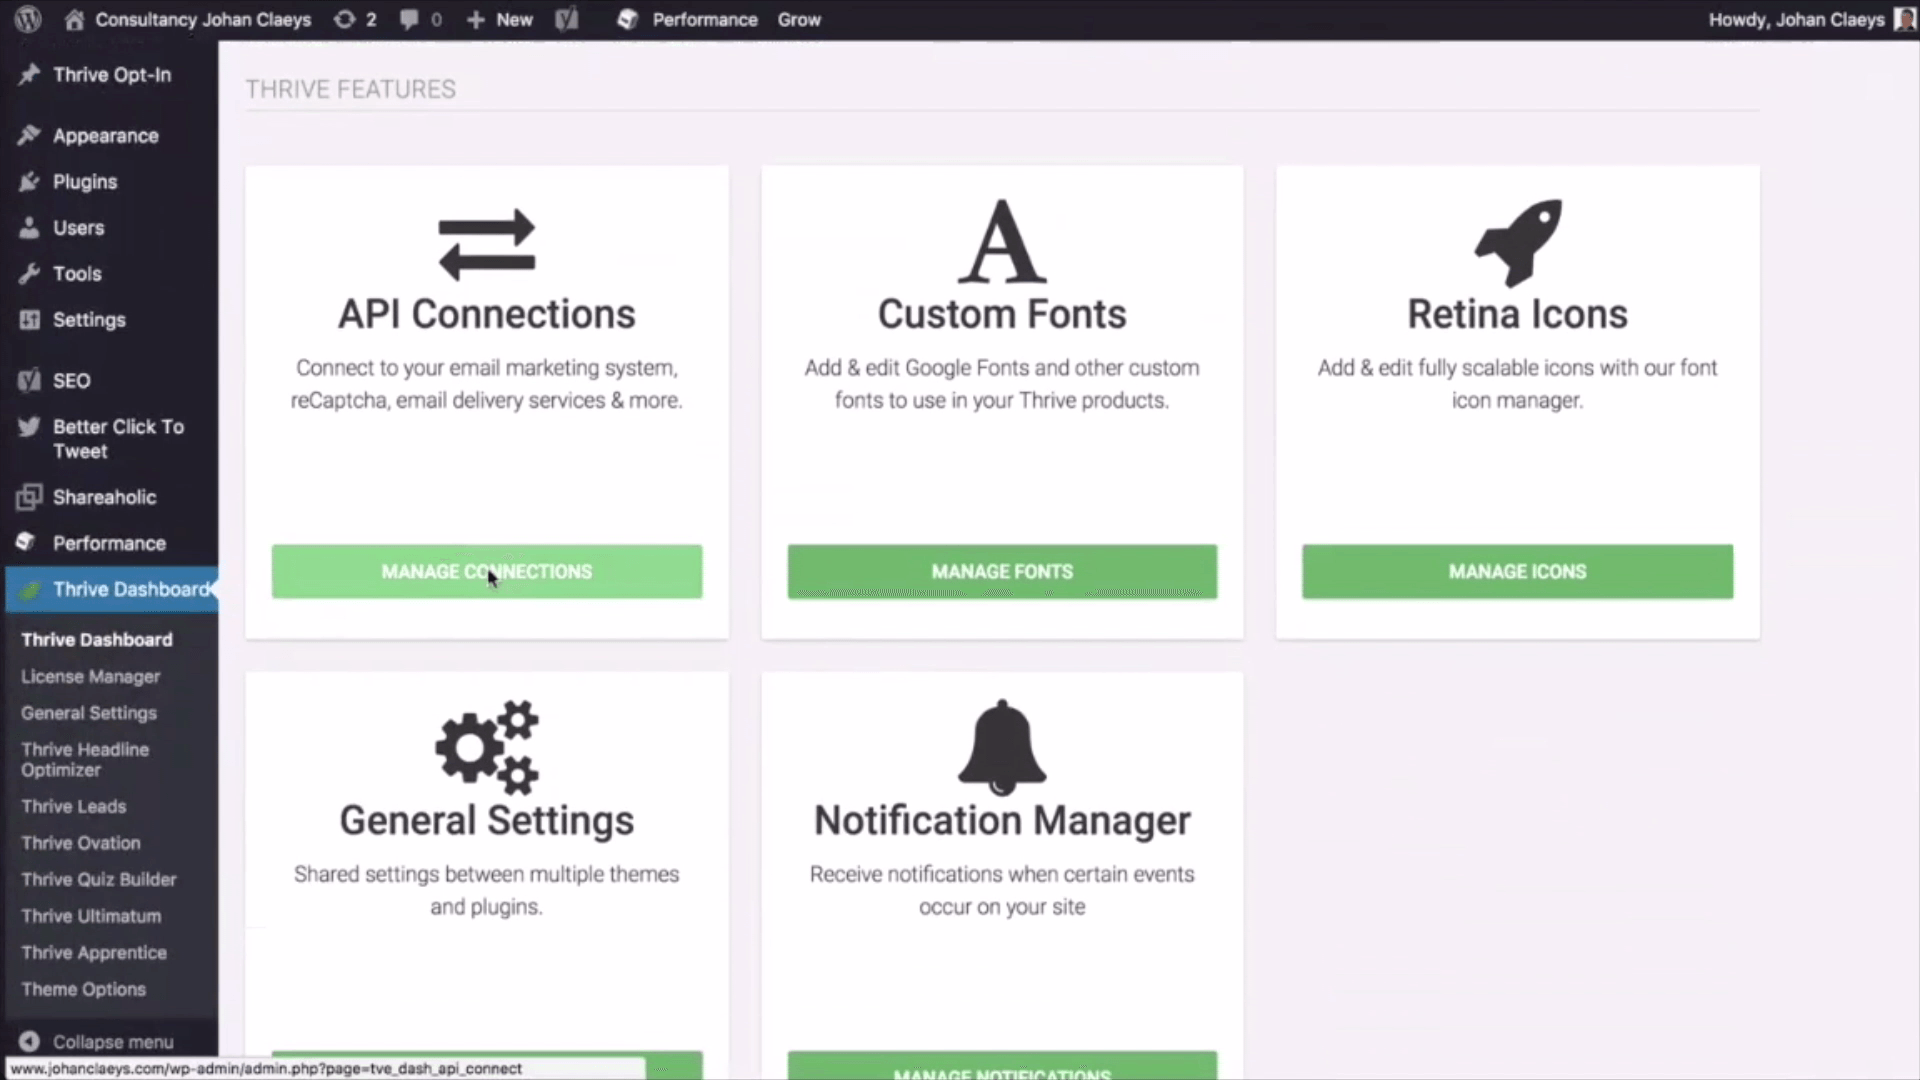
Once you're in your WordPress environment with your installed ThriveThemes plugin, simply go to the Thrive dashboard. From that page, you will see a list of installed ThriveThemes products.
We then need to go to Thrive features where you can manage your API connections and you'll see that you may some API connections already installed.
You can now see that I have a connection with Active Campaign, WordPress and Post Mark. You will then need to add a new connection. Select MailChimp so that it will be added.
Where a webform is the door to your email application, the API connection can be considered as the key that will make your data go straight to you email application #intelliweb
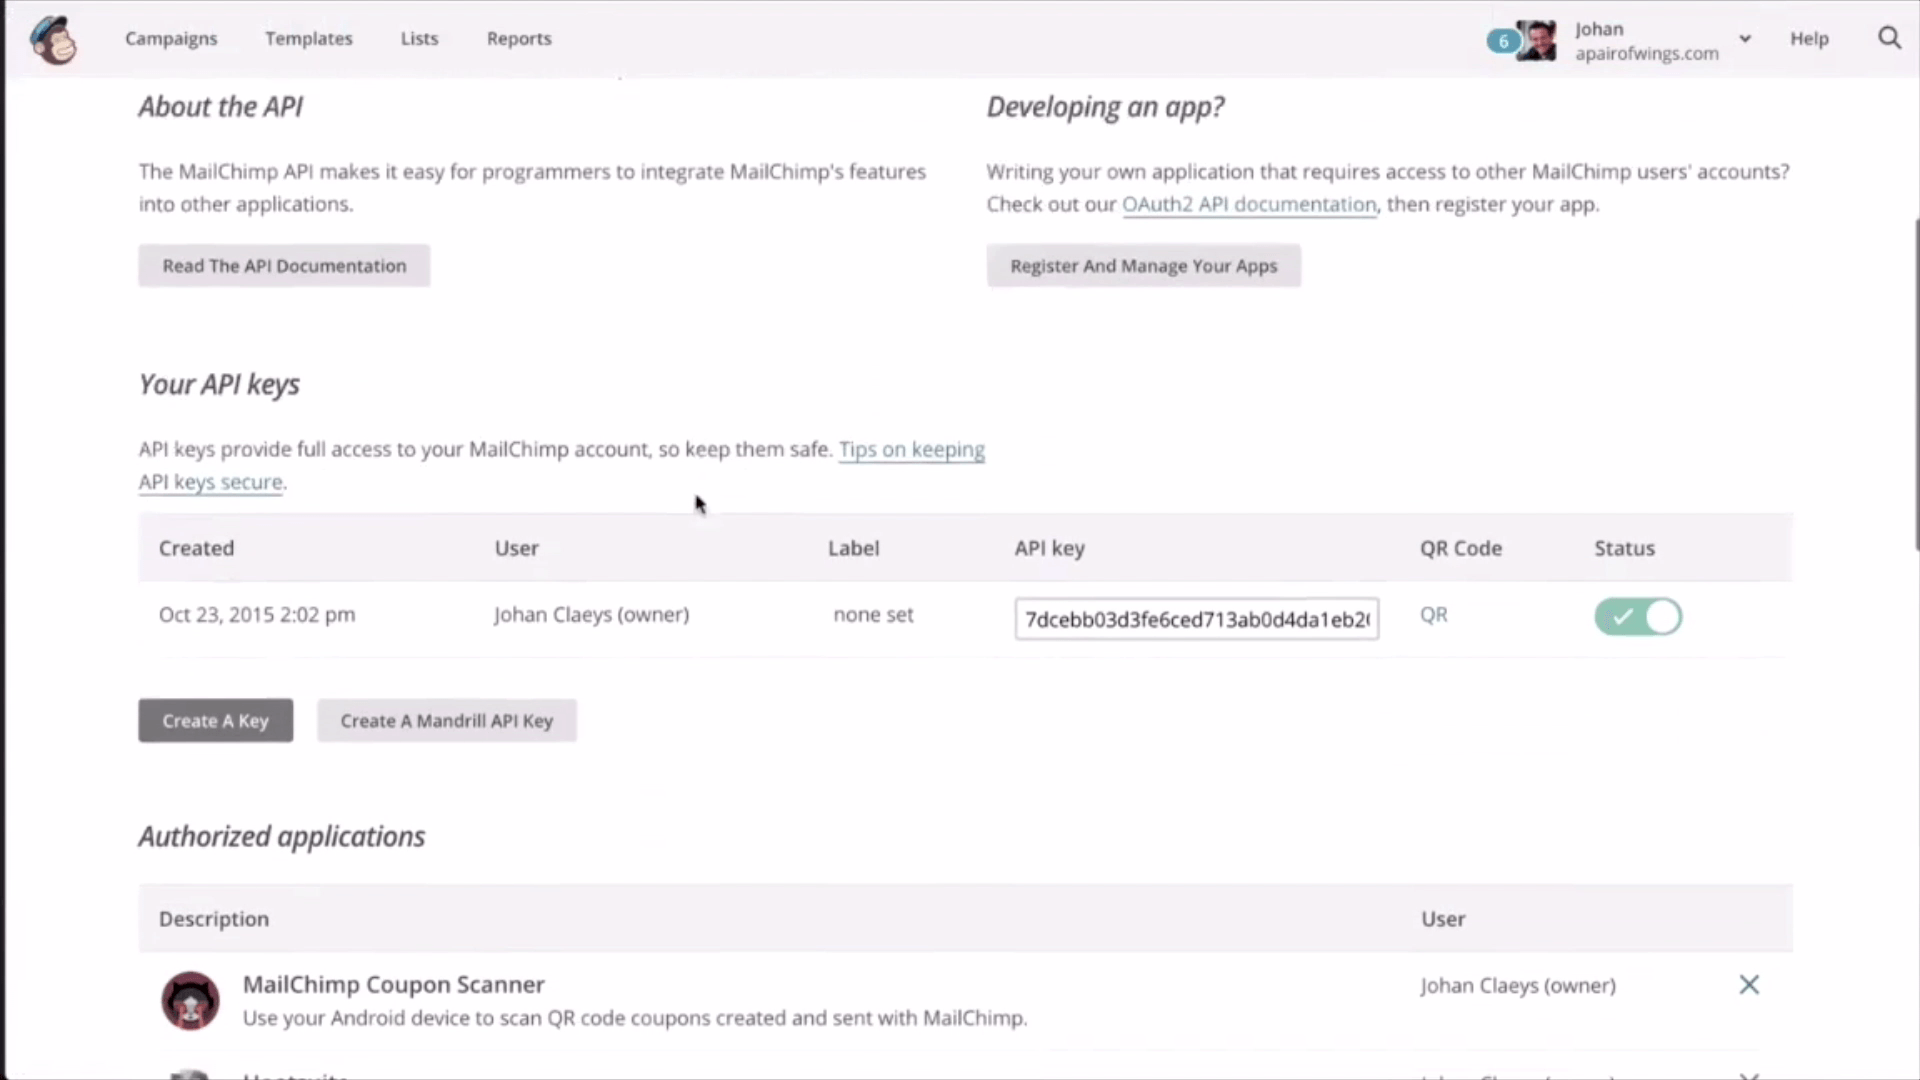
Make sure that before making the connection, you have already gone to your MailChimp dashboard’s profile settings. To do that, click on your username on the top right corner to pull up the dropdown menu. Click on ‘Profile’ and then head to ‘Extras.’ There, you will find your API keys in an alphanumeric string. Copy that string of characters as an API key over to your Thrive Themes connection.
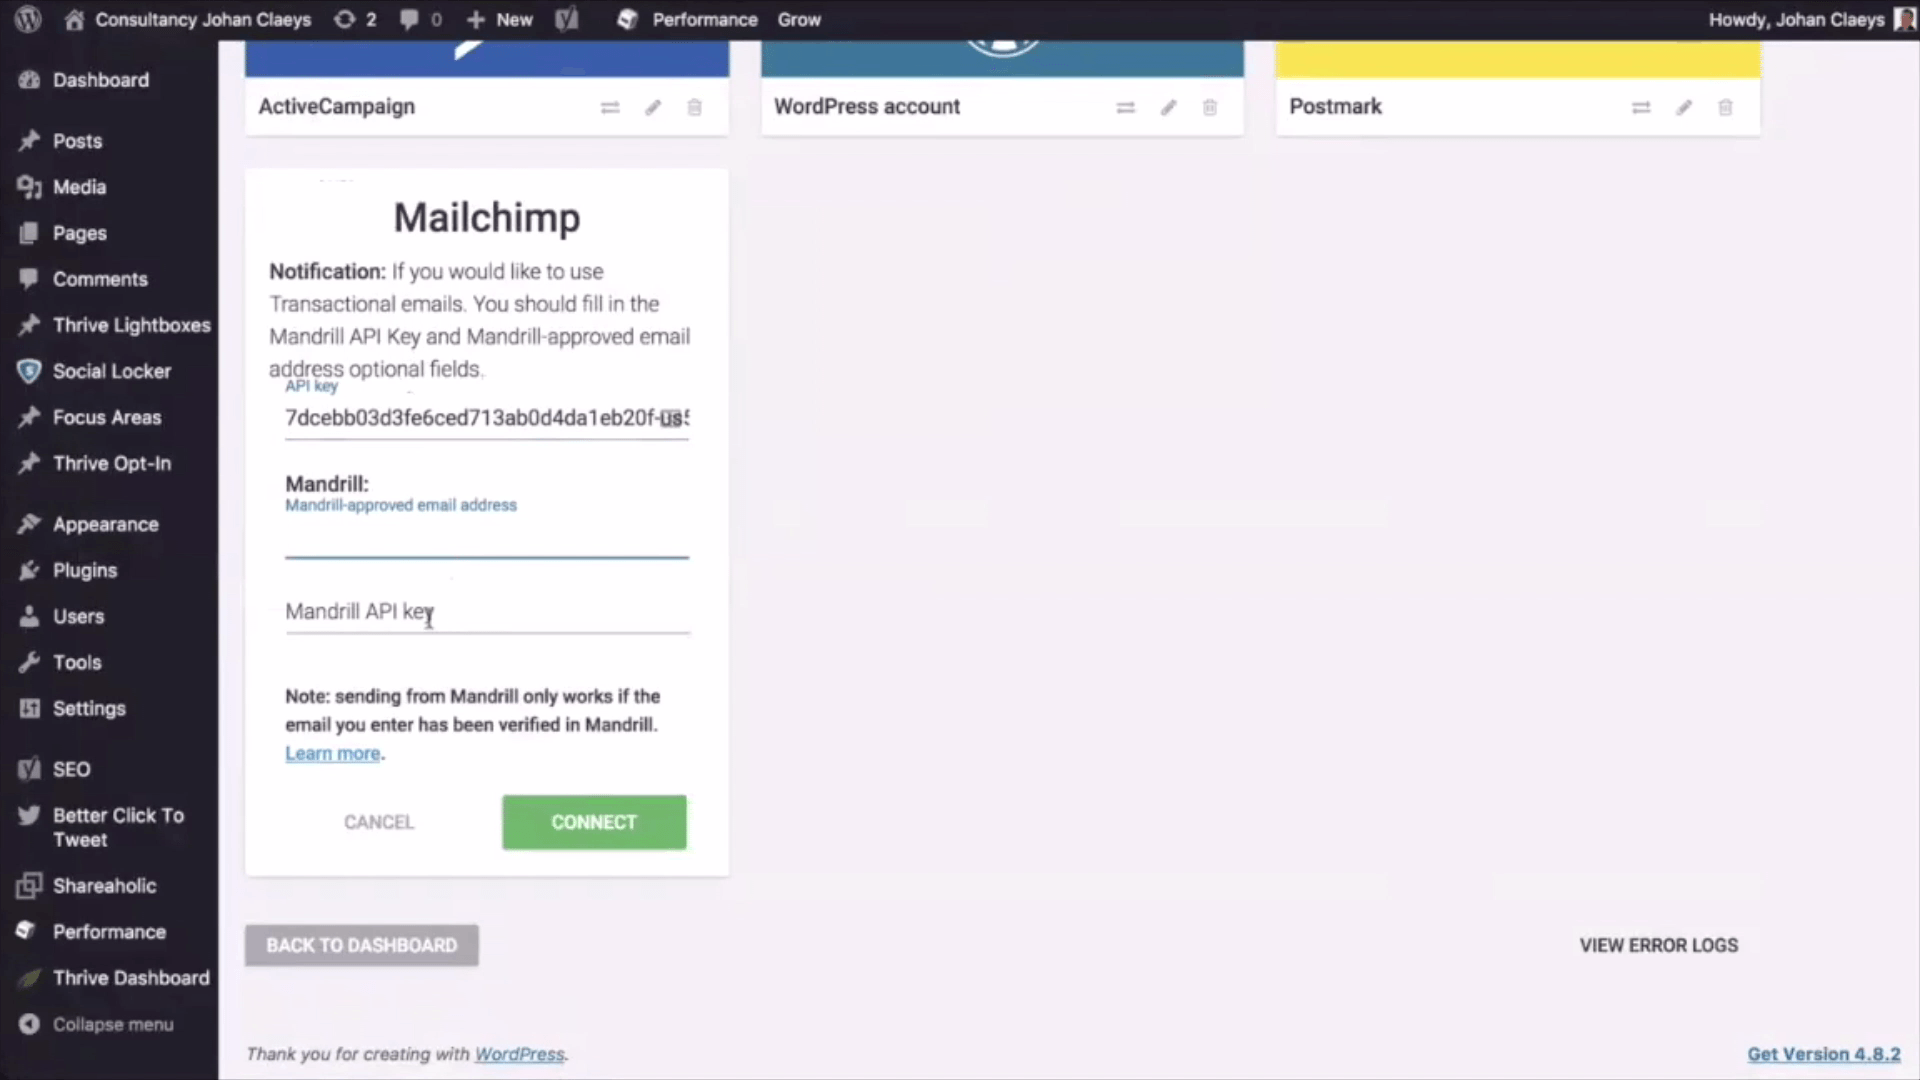
Paste it up here and you will notice that Mailchimp works with Mandrill as an email service solution. You can also create a Mandrill API key and copy that as well over to your connection.
Once you have performed that all the necessary copy/paste actions, you can now connect and you will see that Mailchimp added has been added as a connection to your Thrive themes landing page builder.
Quick explanation of Mandrill


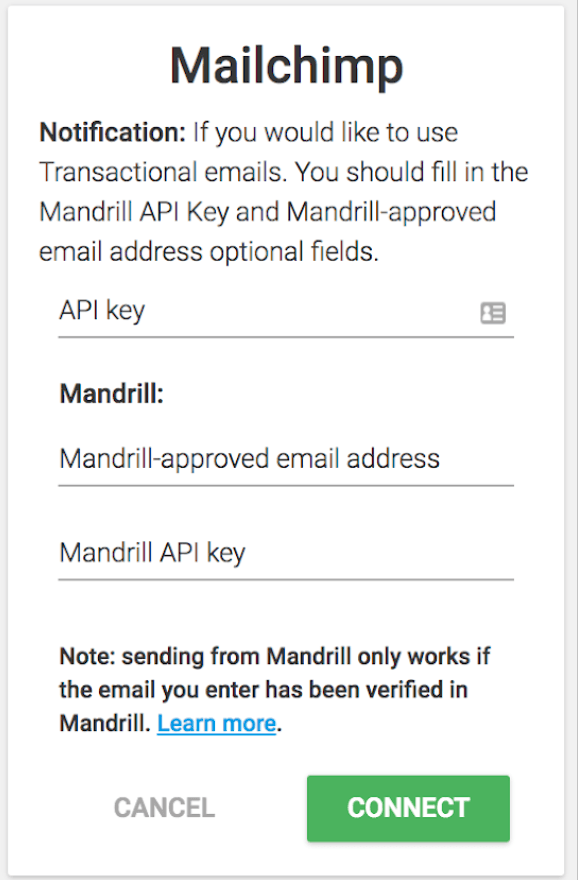
You can also see that there is an option to connect to Mandrill, but I will get back to that in another course. The only thing you need to know for now is that it is a Mailchimp app that helps to reduce the percentage of your mailings that end up in the recipient’s spam folder. The Mandrill service assures good email deliverability.
Choose which ESP to connect to through API
A Landing Page Builder lets you choose which ESP to connect to through API.
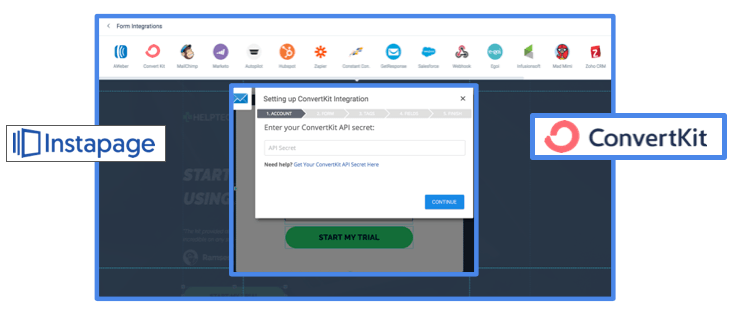
In a standalone landing page builder like Instapage, you can build your form and set up your API connection right within Instapage.
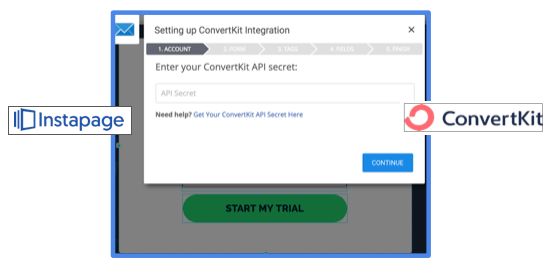
Here you can see how to set up an API connection for ConvertKit. However, all that you’ll see is a landing page builder where lots of ESP’s are supported.
Now that you have some idea of how email service providers work via API connections, let me give you an idea of what mechanism you can use if you want your Lead Generation Form to send the information to a spreadsheet rather than an email service provider.
What if there is no API functionality?
First, let’s address this question: What if there is no API? What if there is no API connection available for the application to give DIRECT authorised access?

The answer is Zapier - an online automation solution that solves these integration gaps. It is very effective in connecting your favourite web apps, such as JotForm, Active Campaign, LinkedIn, Slack, MailChimp, and many many more.
Zapier easily connects with more then 1000 web applications and it acts as a mediator - taking care of all the handling and transferring of your data. Let me explain further:
For example, let’s say that Jotform and ActiveCampaign can’t be directly connected using an API key.
Both of them actually have API connections with Zapier.
Connect both JotForm and ActiveCampaign to Zapier. You are now using two connections to Zapier
Using API’s with Zapier
I can now show you the mechanism I mentioned earlier. If you want your Lead Generation Form to send the information to your email service provider with JotForm and ActiveCampaign, have your form data be submitted through your form builder so that it goes straight into your email storage solution ActiveCampaign via Zapier.
With this, you are not only able to provide an email storage solution but you can also provide a table in a Google Spreadsheet.
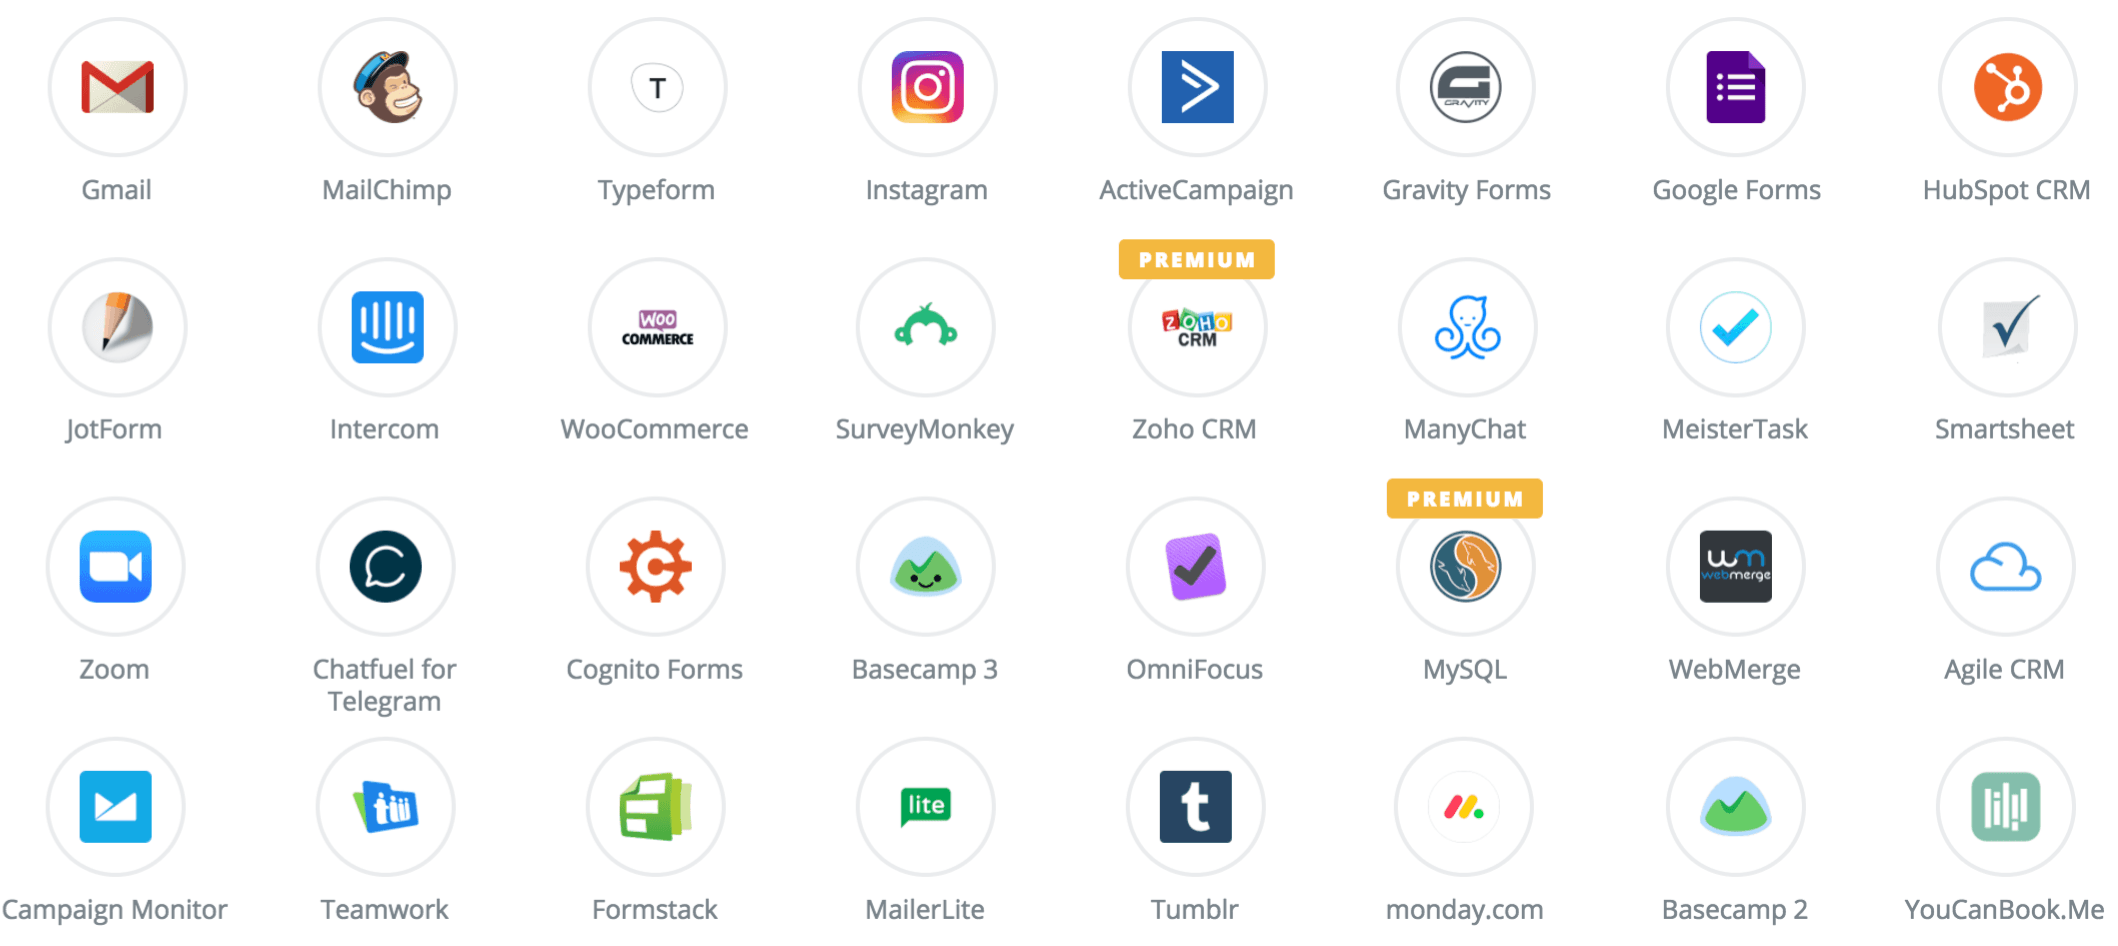
There are more than 1000 web applications supported in Zapier.
Connect your favourite web-apps
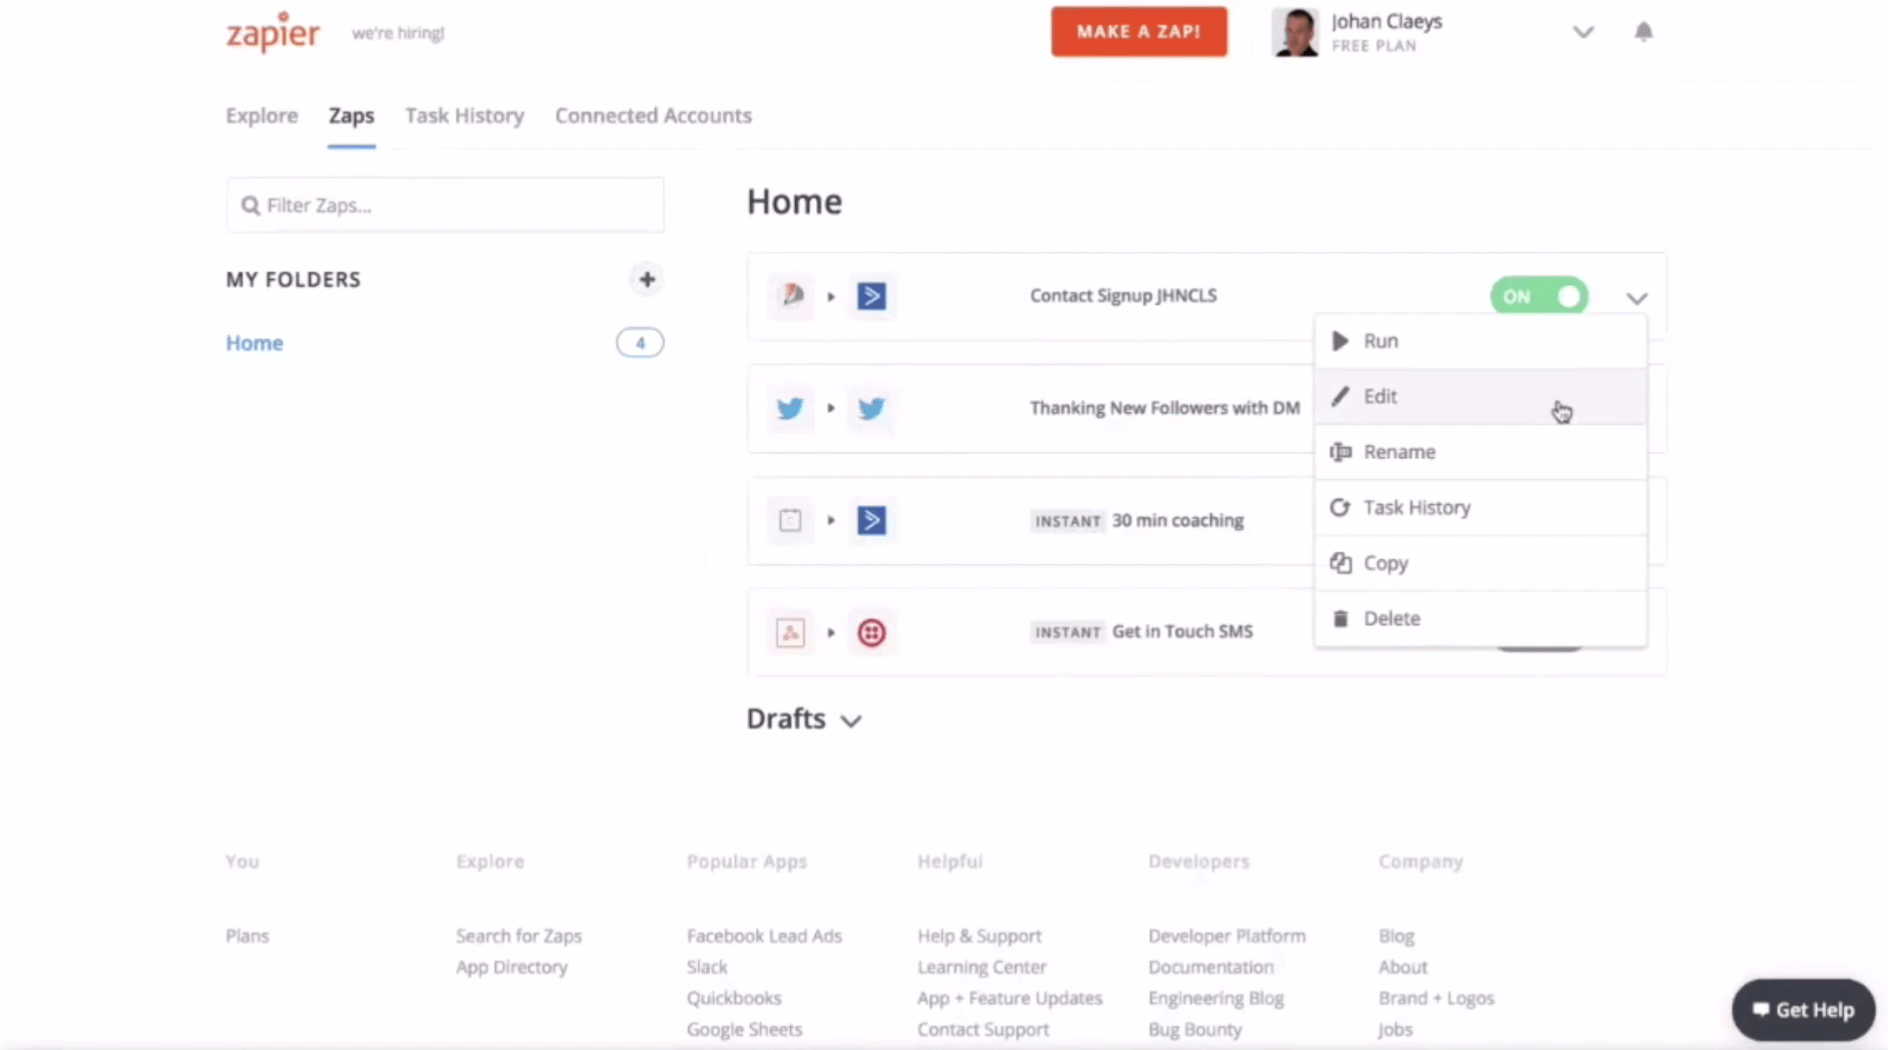
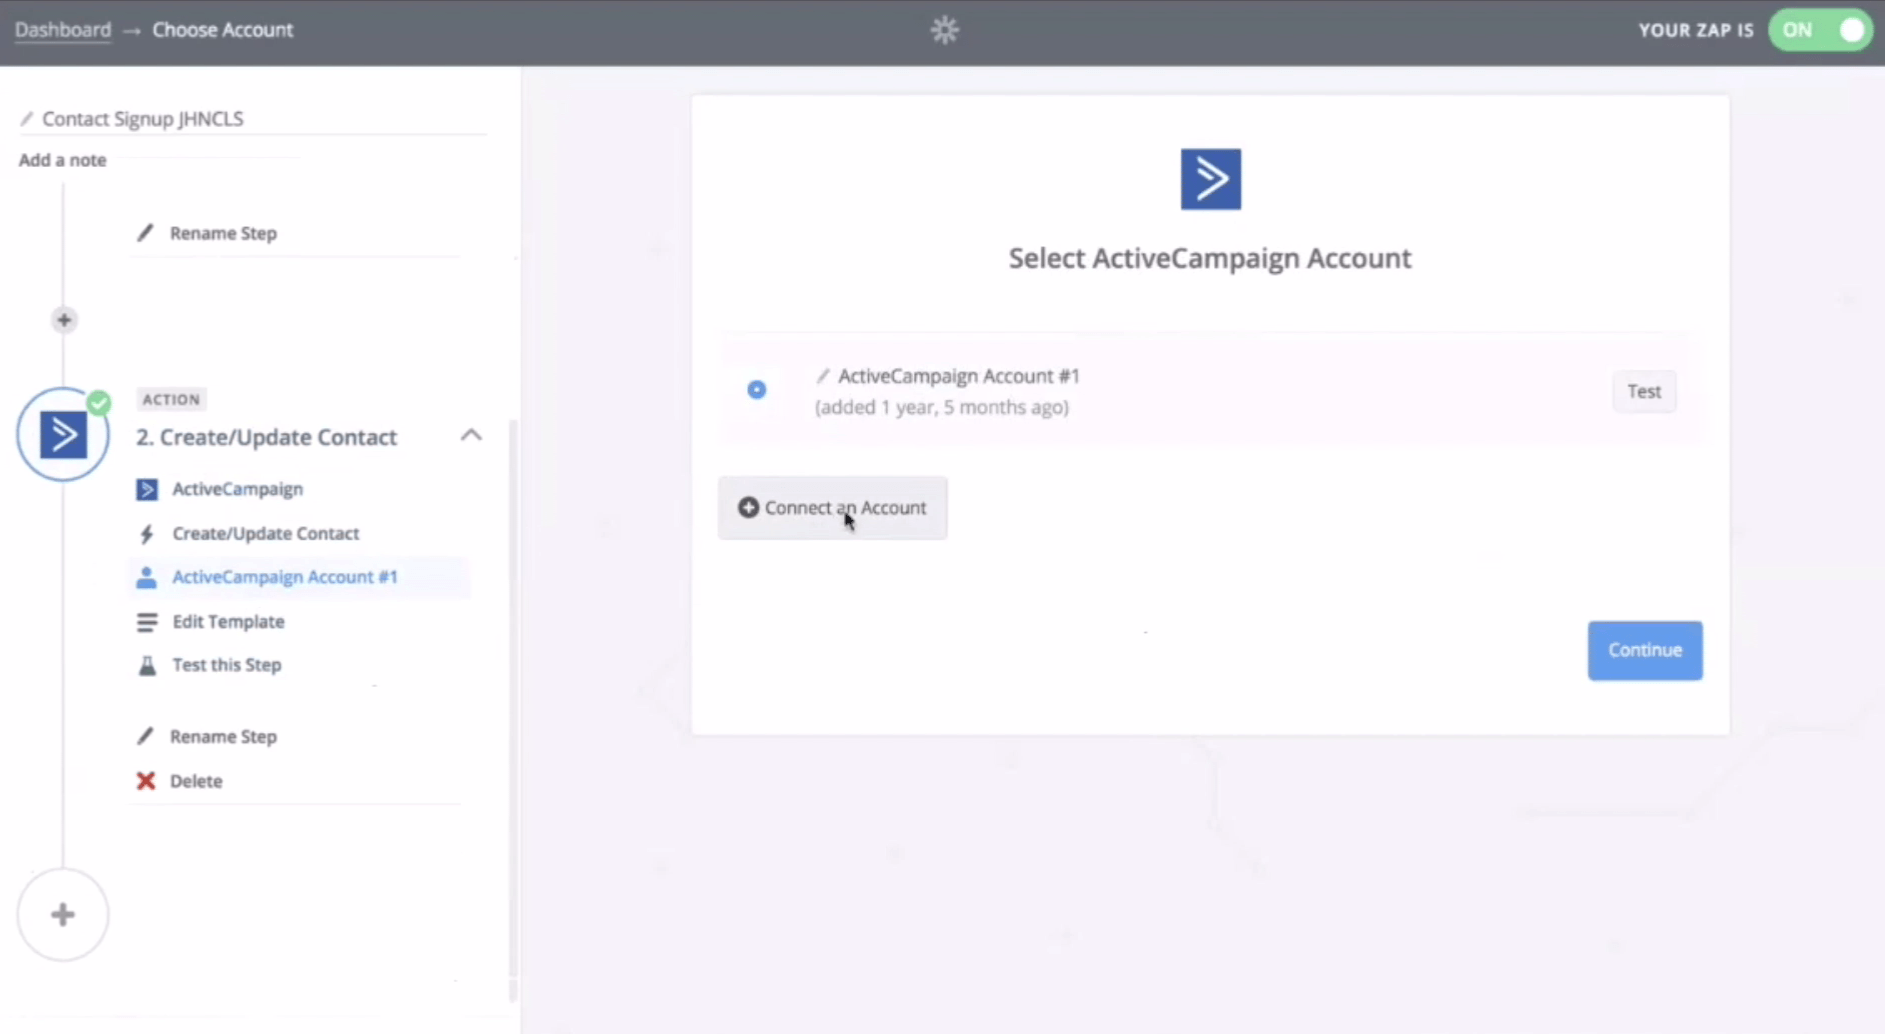
The example I have here in my home is a list of Zaps. The first Zap I have previously created connects my JotForm to my Active Campaign.
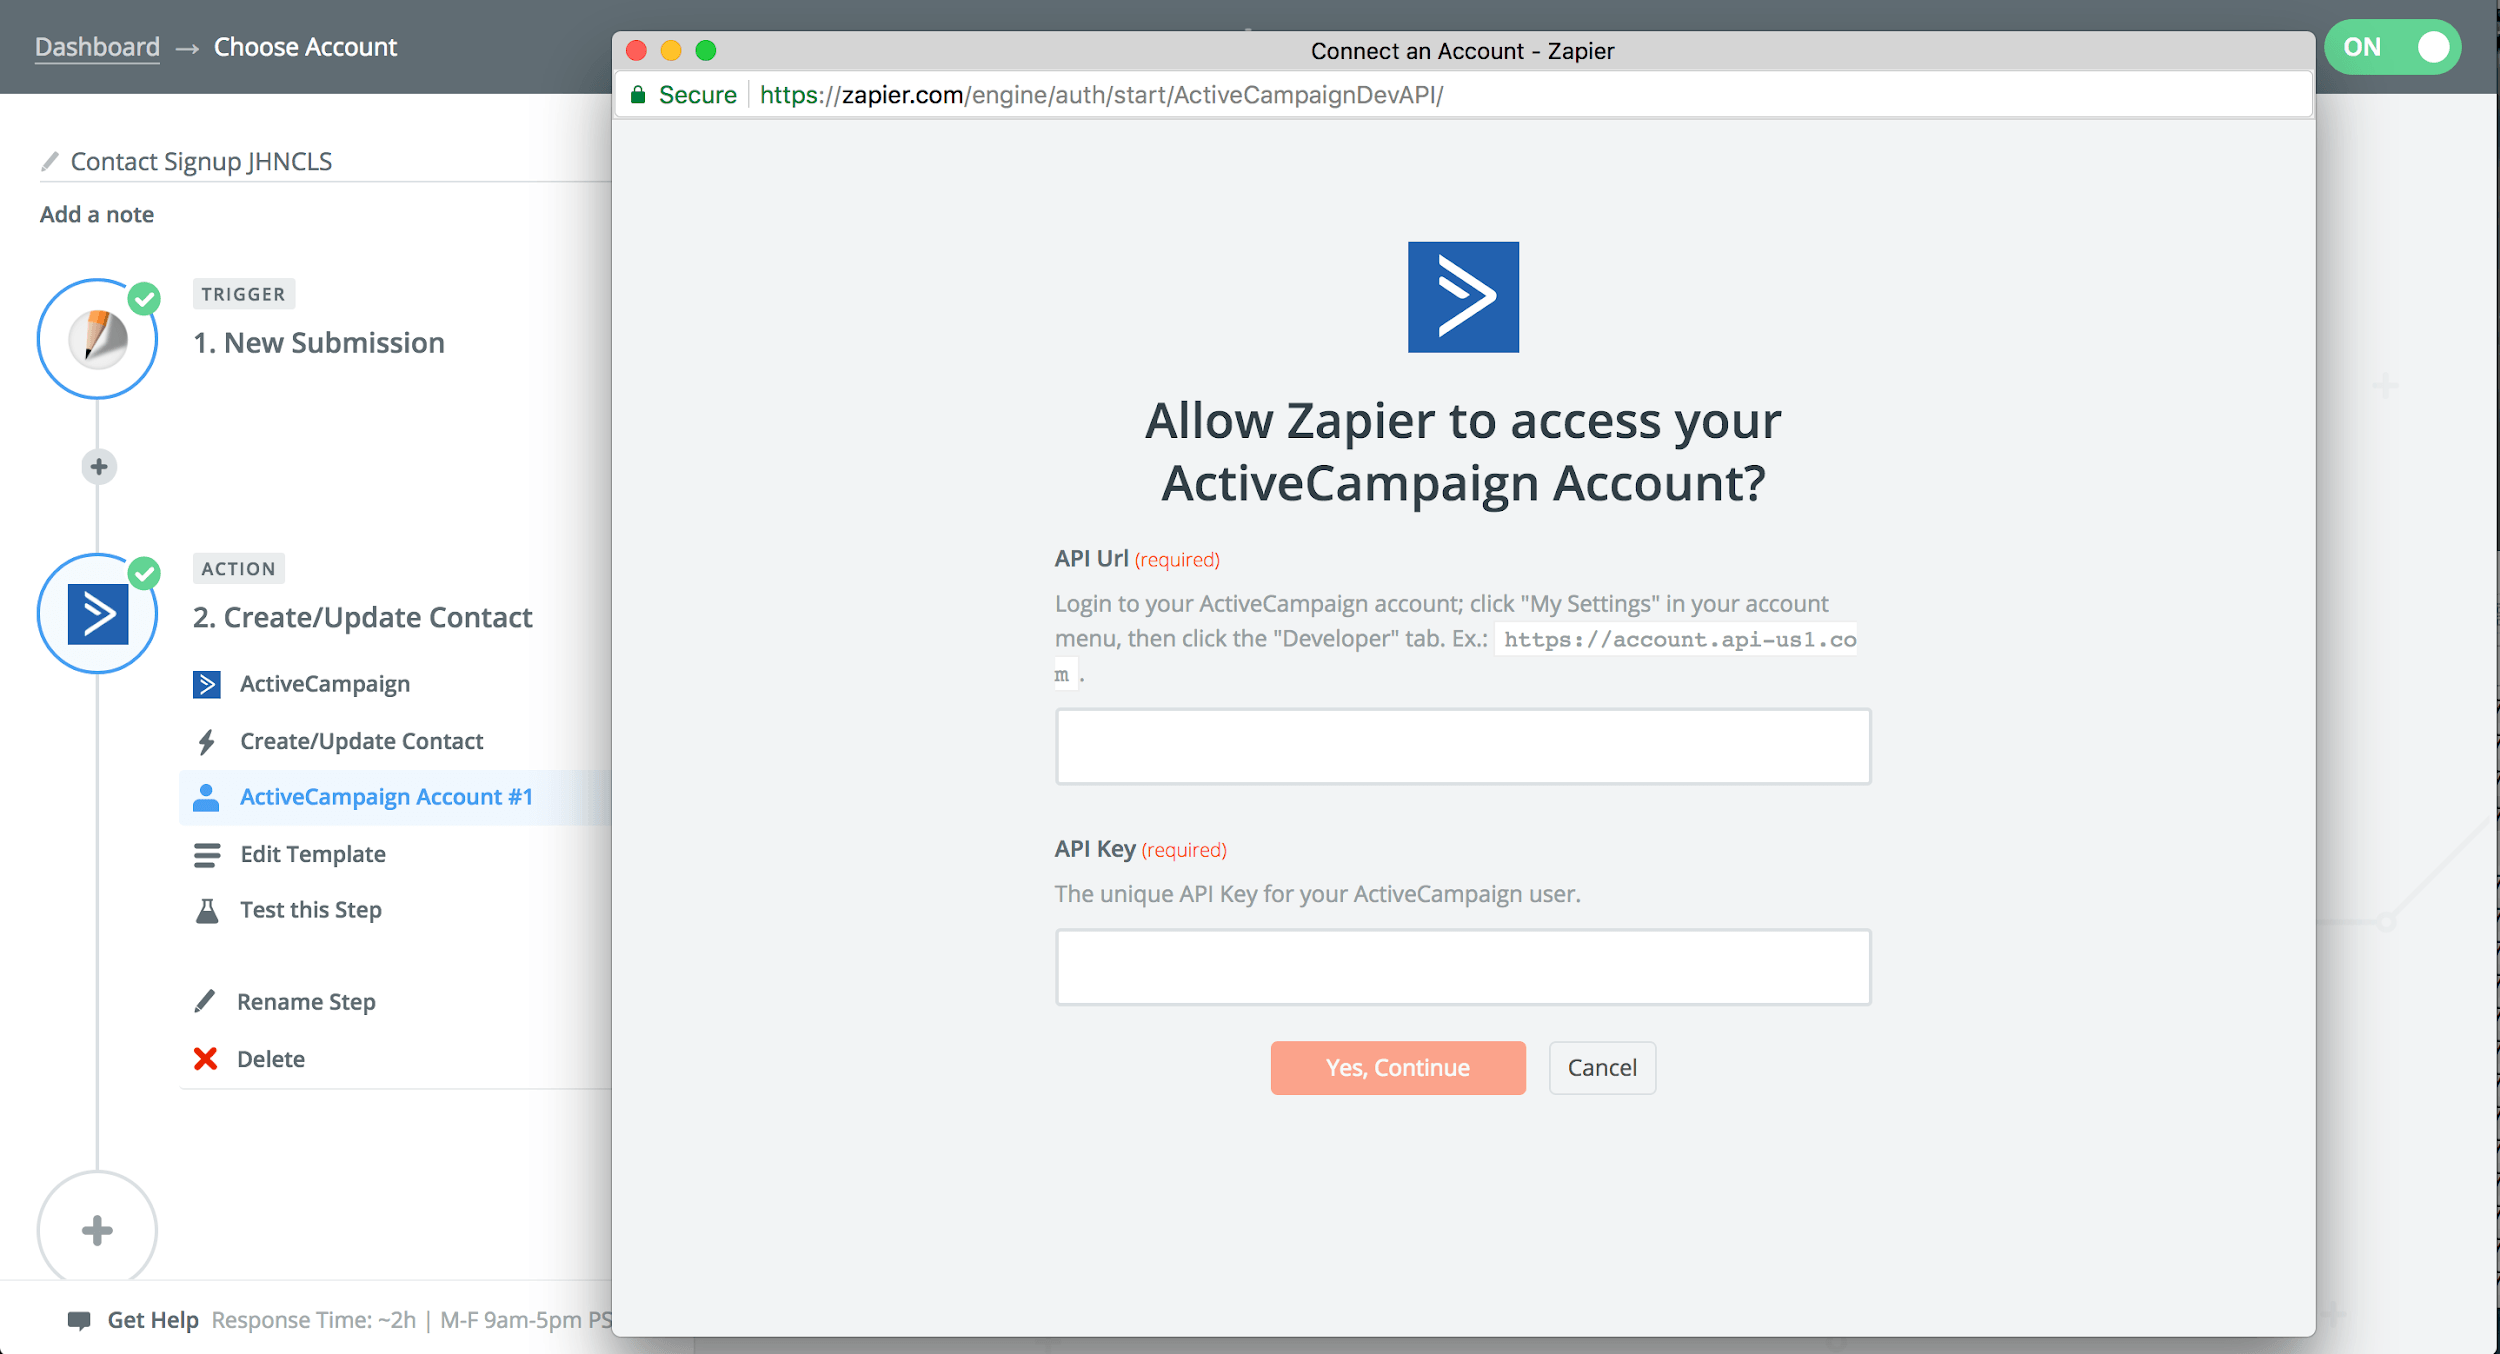
The idea here is that the zap will be triggered by every new submission from my JotForm. Connect your JotForm to Zapier and do the same for ActiveCampaign. Once the submission has been performed, it needs to create or update a contact in your ActiveCampaign. Make the connection by providing the API key of both JotForm and ActiveCampaign.
Once that you have provided these you can continue to test your account.
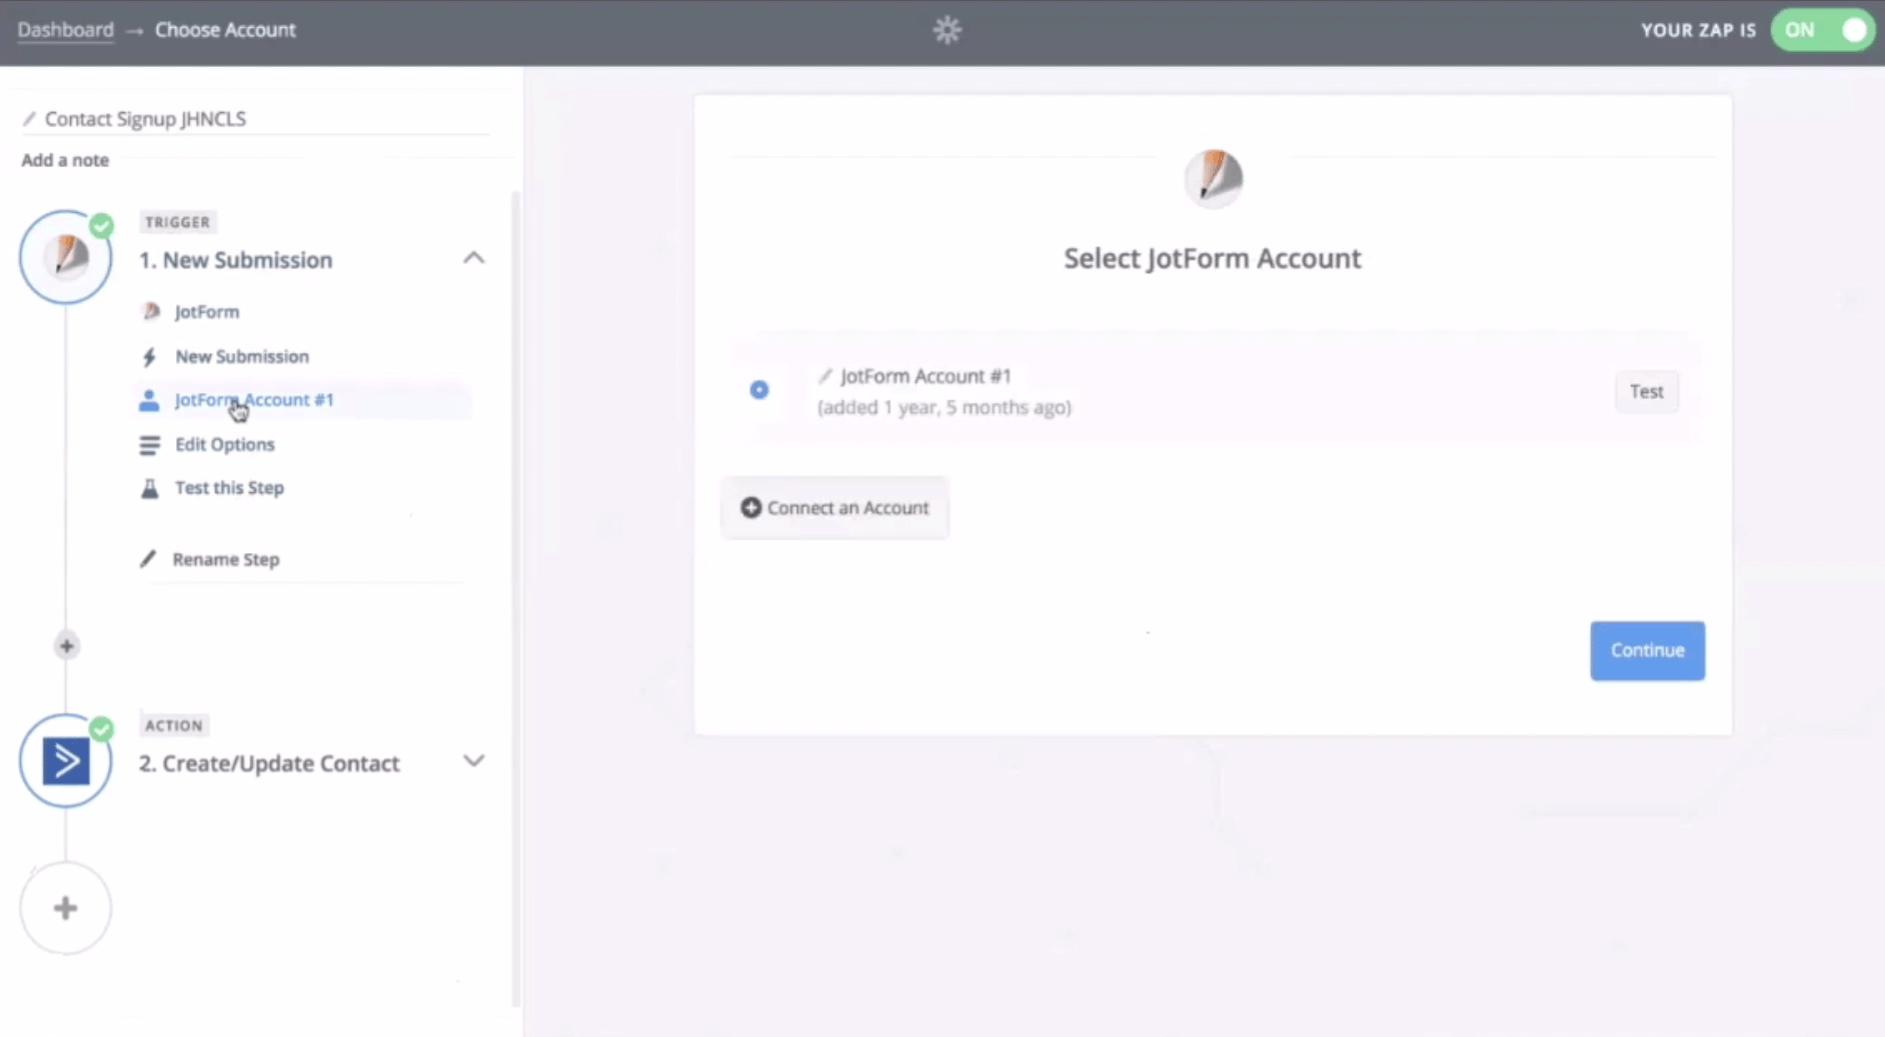
So, equally to JotForm also Active Campaign will be needed to be connected with Zapier and you can simply do that by equally providing the API key of your Active Campaign.
So, once that you have provided these you continue and then you can test your account.
If it is a success, you can continue your Zap and map the fields from your Jotform to your ActiveCampaign fields.
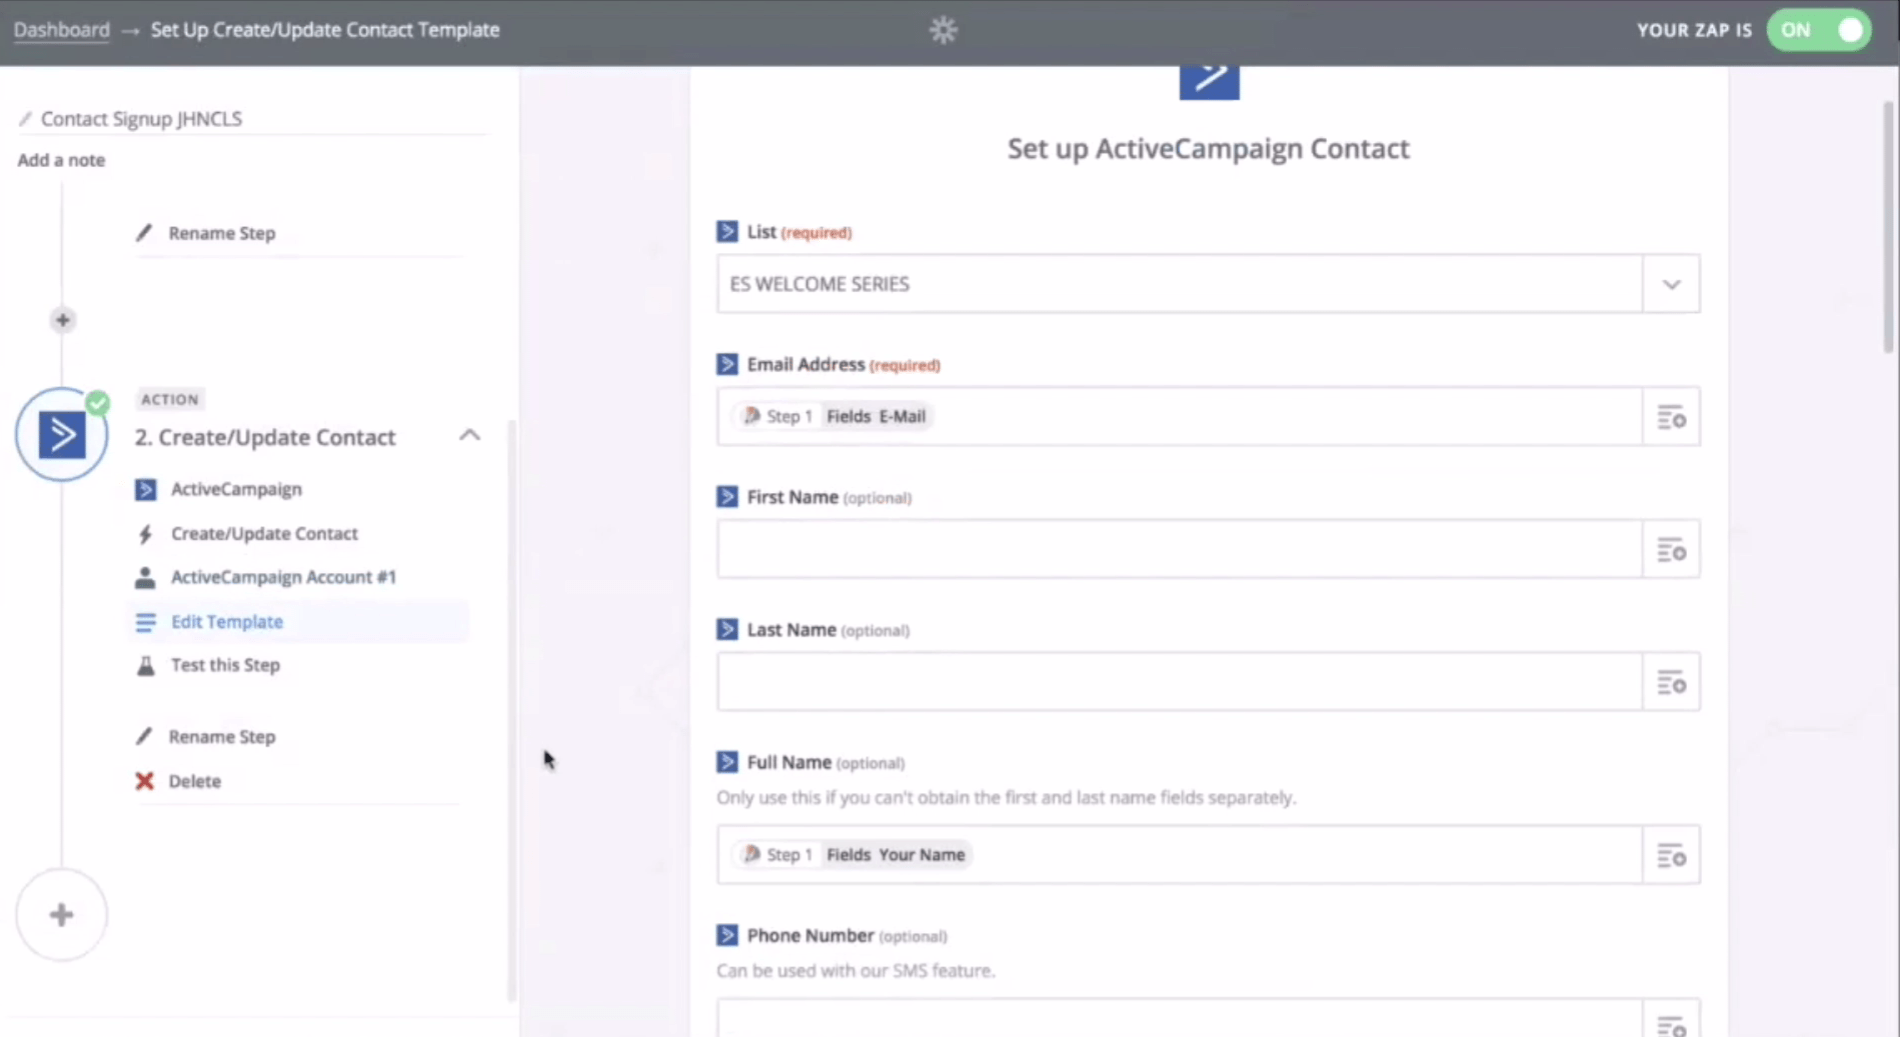
You can always re-test your Zap if it is unsuccessful. If it is successful, you have now created a link of your JotForm Form via Zapier to provision your ActiveCampaign.
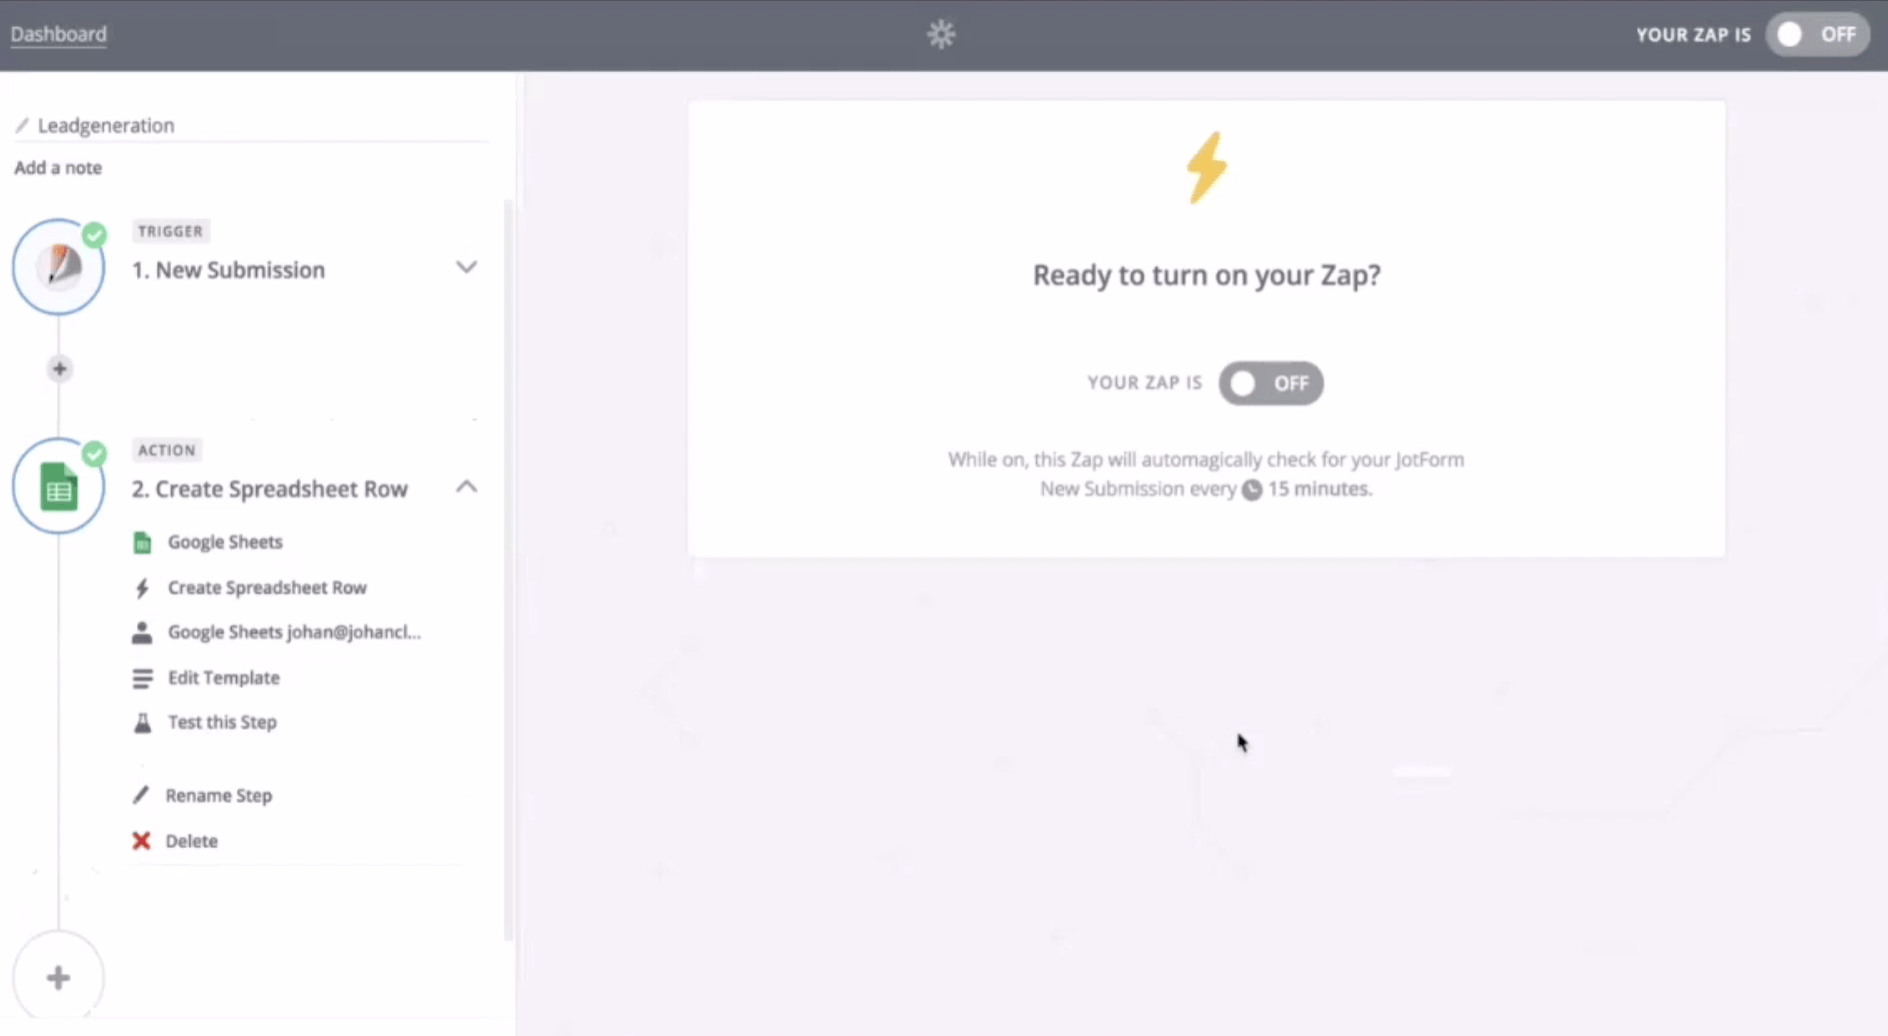
If you would like to provision a Google spreadsheet instead of ActiveCampaign. Do the same setup. Have your Jotform, your form builder, to make a connection with Zapier.
With that, each new submission from Jotform will be triggered in order to transfer the data to a connection. But this time, the second connection is with a Google spreadsheet that will perform an action that is creating an additional row in the Google sheet at each submission. It's basically the same setup as making a connection with ActiveCampaign but you will be selecting a Google Sheets to be provisioned.
API Integration
If here is a request call from one application using the API key information the other application. It will check if the API key is authorised to access or not. With API keys you allow access your account in other applications through a request call without you having to give out your password.
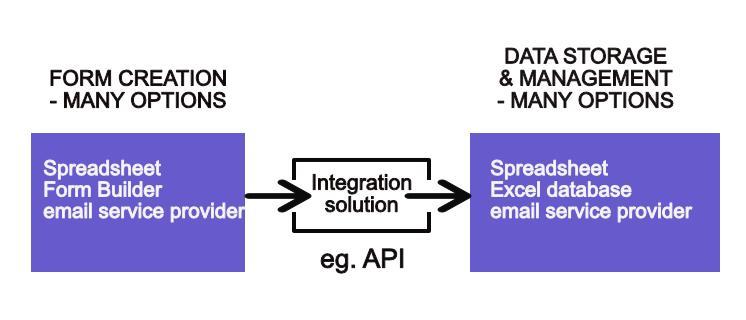
Note: You will need manager permissions to generate and view API keys.
API key Security
I would like to say something about API key security. This is important because with API keys, you can allow other apps through a request call to access your account without you having to give out your password.
API keys grant full access, so they should be protected the same way you would protect your password. Be careful not to expose the key in public and be vigilant when sharing them through email.
If an API key has been compromised, or you no longer use the connection that was accessing your account through a particular API key, disable that API key.
Conclusion
Working signup forms are imperative for any business
In my opinion, it’s important to make good working signup forms because they are the front doors to your email storage solution. In fact, I believe that integrating these forms is all about your data going straight to your email storage solution.
EBOOK
BLOG CATEGORIES
RELATED POSTS
BUILD YOUR MAILING LIST

